Skip to content
This year, I started promoting my blog on Pinterest at the end of January 2024. I had bought a book and taken a course to make sure I did everything the right way. It was going very well, and I was growing quite fast.
Unfortunately, despite my best efforts, things took a turn for the worse. My account got banned by Pinterest at the beginning of March without any explanation. At first, I had no clue what I had done wrong. But now I know that I could have done some things differently. One of those things was listening to what many Pinterest educators are still teaching.
Pinterest has recently undergone drastic changes and is not what it used to be. According to this source, Pinterest brought out a statement in December 2023 that they are updating the algorithm to track spammy activity such as overpinning.
So some of the things that were taught to me a few months ago were wrong from the very beginning. In this blog post, I want to teach you how to start on Pinterest the right way, whether you have a new blog or not much content to share.
From my research, I’ve found that not many people are talking about the new rules for posting on Pinterest, either on their blogs, YouTube videos, or even in their training. So I hope this helps every beginner avoid making the same mistakes I did.
I won’t elaborate on how to create your Pinterest account and boards here; you can find that information in this blog post. This post will focus solely on how to post your pins correctly in 2024.
Disclaimer: I include affiliate links in my articles. Clicking on these links and making a purchase might earn me a commission without any additional cost to you. I value transparency—find more details in my Affiliate Disclaimer.
My mistakes on Posting Links on Pinterest
If you own a blog or website, you’re on the right track to post links on Pinterest. In the case that you don’t have a blog or website yet, don’t worry; you can still post links on Pinterest. You will need a domain and either a WordPress site or some other website builder or landing page builder. Then, you’ll need to create simple landing pages to promote your products.
If you want to learn more about starting on Pinterest without a blog or website, check out this blog post.
However, a large portion of Pinterest users have their own blogs and are looking to drive more traffic to their websites. So, how do you post your links on Pinterest?

Firstly, it’s best if you already have some blog posts published.
In January, I had 8 blog posts already published, which can work if you don’t want to pin daily on Pinterest. But Pinterest loves activity and if you want to be consistent in your pinning, I recommend waiting and taking the time to write more blog posts. I’ll explain my mistake shortly. Once you have more blog posts, make sure to create at least 5 pin graphics before even starting with Pinterest.
Take your time to be prepared before you start pinning, as this will save you a lot of time. After you’ve started with Pinterest, you still need to make sure you’re able to write 1-2 blog posts a week and create fresh pins for each blog post.
What was My First Mistake?
Unfortunately, some Pinterest educators still teach that you should post 10–15 pins daily to see growth. However, this is no longer accurate, especially if you only have 8 blog posts like I did.
To get to these 10–15 pins per day, Pinterest educators advised doing the following:
Create five graphics per blog post, and pin the first graphic to the most relevant board. Then, repin it to a second relevant board after a few days and continue this process until the same pin is repinned 4 times. Each new graphic should be pinned to the most relevant board 7 days after pinning the first graphic and then again repinned 4 times. After pinning all 5 graphics and repinning them, I was told to stop for at least 3 months, then create new graphics for the same blog post and repeat the process.
However, this information is no longer accurate. Pinterest has undergone drastic changes, and it’s becoming more strict with new users to avoid spammy pinning.
With my 8 blog posts and some other landing pages, I was pinning 10 times a day for at least a month using the strategy I had just learned. Later, I discovered more Pinterest educators explaining the new correct way to pin on Pinterest, so I changed my strategy right away. Unfortunately, it didn’t help, and my account was closed shortly after that.

What was My Second mistake?
I learned that it is possible to post affiliate links on Pinterest by disclosing them as affiliate links. This can be done by adding text in the description or by using hashtags such as #ad, #afflink, or #affiliatelink.
I must admit that I didn’t do this often; I focused more on posting my own links on Pinterest by regularly creating more blog posts or landing pages.
Today, I wouldn’t recommend posting direct affiliate links on Pinterest. As I said, I didn’t get any explanation from Pinterest as to what caused them to ban my account. And even though people are still promoting this, I just wouldn’t risk it anymore. I will only post links to any claimed accounts I have on Pinterest.
How to Post on Pinterest the Right Way
First, take the correct steps to set up your Pinterest business account before starting with your pinning strategy. This means, verifying your website or any other accounts you want to use, such as your social media accounts. Create a professional Pinterest profile that is optimized for your audience, and create boards that are relevant to your business.
If you want to know more about starting with Pinterest, check out this blog post.
As mentioned earlier, it’s important to take your time before starting with Pinterest. For each blog post or link, you should have at least five pin graphics ready to be pinned. Also, ensure that you have enough links to post consistently and regularly.
You only need to pin 1–3 times a day to see consistent growth on your Pinterest account. Pin each graphic once to the most relevant board only. Use repins for group boards to increase your reach, but avoid repinning the same graphic to your other boards, as this can make your page appear spammy.
Wait 4–7 days before pinning another graphic with the same link.
After pinning the same link to the most relevant board with all the graphics you created, pause for a few months. Then, create new graphics to begin pinning the same link again.
Repeat this process for each link!
Also, consider how your blog posts have been performing and optimize the content or the title before you start pinning the link again.
How to Organize Your Pinning Strategy
Now, I’m going to tell you about the biggest mistake I made with my pinning strategy. Well, it’s the only mistake that I found in the operating agreement. And probably the reason my account got closed.
Many of you might wonder how to find time for daily Pinterest posting. As you likely know, pins can be scheduled weekly, monthly, or even months in advance.
Pinterest Scheduling Tools
The most well-known Pinterest scheduler is Tailwind, renowned for its numerous smart features designed to optimize your pinning strategy. With Tailwind, you can schedule your pins several months in advance, significantly saving time in your content planning process. Tailwind’s pricing starts at $14.99 per month with the annual plan, but unfortunately, this may not be affordable for everyone.
Another way to schedule your Pins easily is through Canva. That is very practical since most people are already creating their Pinterest graphics on Canva. This feature is only available to Canva Pro users, though, so you would also need to be able to invest in this tool.
Even though I totally love Canva and have been using the Pro version for two years now, not everyone can afford the Pro version.
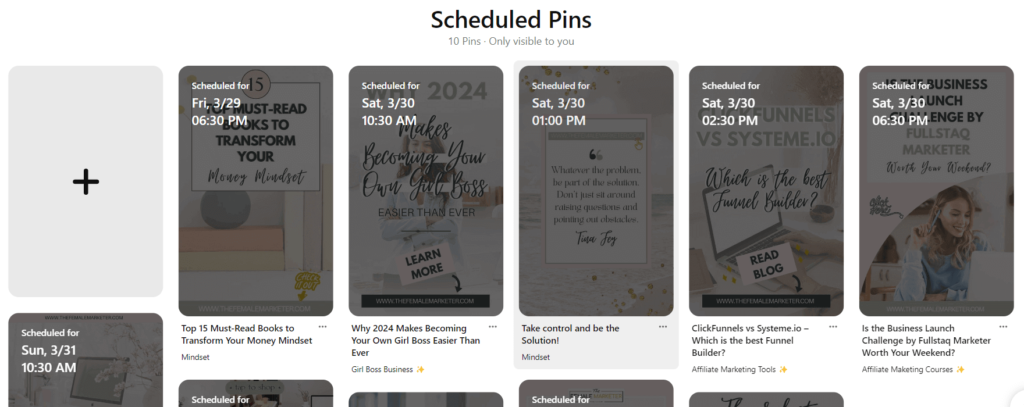
A free option for scheduling your pins is to use the Pinterest scheduler. You can schedule your pins up to one month in advance.
This feature is very practical because you don’t actually need an external scheduler to plan your Pinterest pins. The only downside is that the Pinterest scheduler lacks the organizational structure of a calendar, which can make it easy to lose track of which pins you’ve already scheduled and which ones are still pending, as you can see in the picture below.
However, there is a free method to keep everything organized, which I will discuss later. First, I want to explain the biggest mistake I made, so you can avoid repeating it.
My Biggest Mistake
Last year, I had already purchased a tool to schedule my content for all my social media accounts through AppSumo, taking advantage of an amazing lifetime deal. AppSumo is the best place to find affordable lifetime deals for tools, software, and courses.
So, I had this scheduler that I was already using for all my other social media accounts. I thought, why not use it for Pinterest too? However, it turns out that Pinterest only works with partner programs. If you use a scheduler that is not partnered with Pinterest, your account could be marked as spam.
Even though I started using the scheduler in the middle of February and only for a short time, my account got banned shortly after. That‘s the only explanation I have for what I did wrong.
Now I’ve learned for the better. I changed the way I was scheduling my pins because I found that with the Pinterest scheduler, I was losing sight of my pins. Now, I keep all my pins organized and never lose sight of the content I’m pinning.
Let me show you how!
Organize Your Pins with Notion
Notion Calendar and Tables
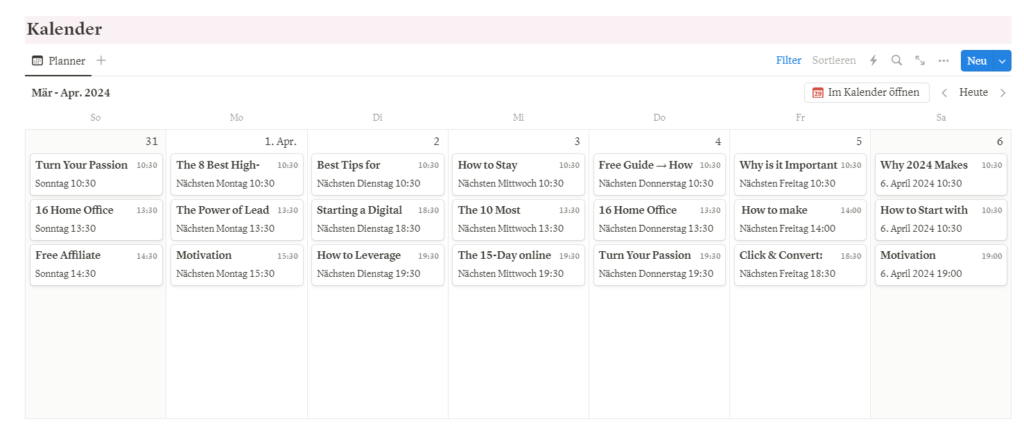
In my content planner for Pinterest in Notion, I created a calendar where I keep track of all my content.
Underneath, I organize all my blog posts along with their graphics in a table format
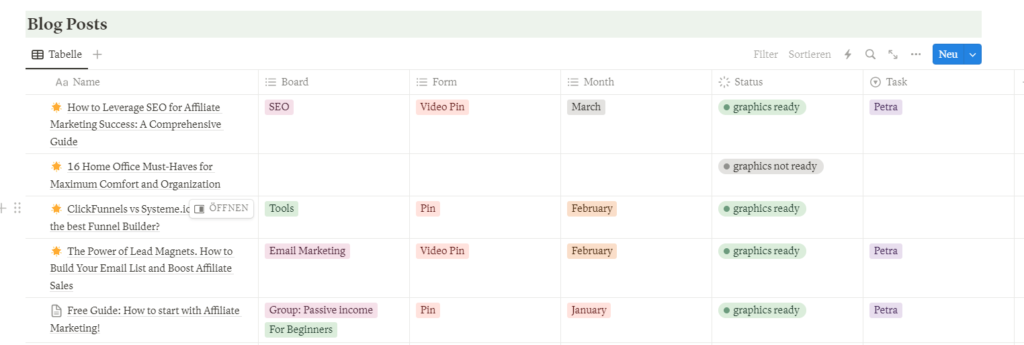
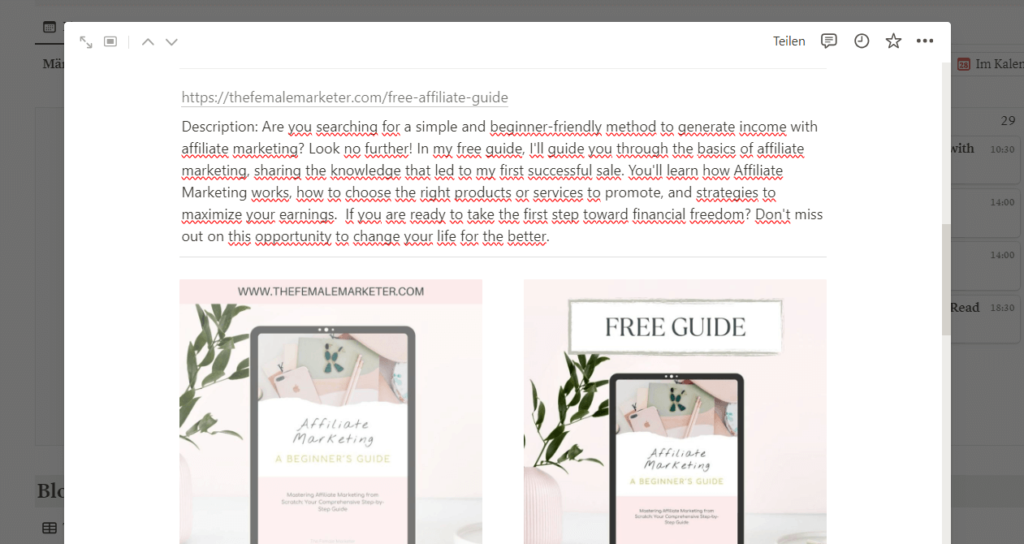
Each entry in the table includes the title of my blog post, its link, the description I use on Pinterest, and the corresponding graphics for the pins, as you can see below.
After organizing the entries in the table, I schedule them on my calendar as pins. I duplicate each blog post-entry and move it to the day it should be pinned. Then, I select the graphic to be used on that day and remove the others. I repeat this process for each entry, scheduling the pin for the same blog post a few days later.
I include the exact hour in my calendar when the pins should be published. Furthermore, I space out the 1–3 pins throughout the day rather than posting them all at once, as you can see above.
Once all the pins are scheduled for the month, I set a day to schedule them on the Pinterest scheduler. This way, all your pins, blogs, graphics, and additional information are organized in one place, saving you a lot of time.
After all the graphics for one blog post have been pinned, I mark them as used, change the entry status to ‘images not ready,’ and select the month for when I should pin the same blog post again. And that is how I manage to keep everything organized.
Analytics
After your first month of pinning and every subsequent month, it’s essential to review your analytics. Look beyond just the number of impressions, clicks, and saves your pins have received. It’s crucial to identify which graphics resonated well with your audience and which ones did not perform as expected.
Analyzing this data allows you to create more successful graphics, perhaps with slight variations, and discard the underperforming ones.
Essentially, optimize what works well and eliminate what doesn’t. If a graphic performs well, consider creating several similar ones and assessing their performance at the end of the month.
Continuously refine and improve your graphics to better engage your audience.
Last Advice
If you don’t have a lot of content but still want to start with Pinterest, I recommend posting every other day rather than sharing all your links at once. Ensure you can consistently create blog posts to experience gradual growth on both Pinterest and your website.
I cannot emphasize enough not to make the same mistakes I did. So here is a short Summary:
- I do not recommend posting affiliate links directly on Pinterest. If you choose to do so, please disclose them as such. Alternatively, create simple landing pages to promote your products.
- Limit posting the same link to a maximum of 5 times, then pause for a few months. I was advised to pause for 3 months and then create new graphics for the same link.
- Pinterest prioritizes new, high-quality pins. Create 5 different graphics per link and post them on the most relevant board. Only repin the same graphic to group boards.
- Pin 1-3 Pins max!
- You don´t need to pay a lot of money on a scheduler. Use the Pinterest scheduler and organize your pins with simple tools like Notion.
- Analyze, analyze, analyze! Review not only the content in your blog posts but also how your pins are performing.
I hope this blog post is useful for you. When I first started, I felt overwhelmed with all the information available about Pinterest. Much of it isn’t very beginner-friendly, especially with all the recent changes.
Remember, Pinterest growth is slow but sustainable!
Happy Pinning, everyone!


")